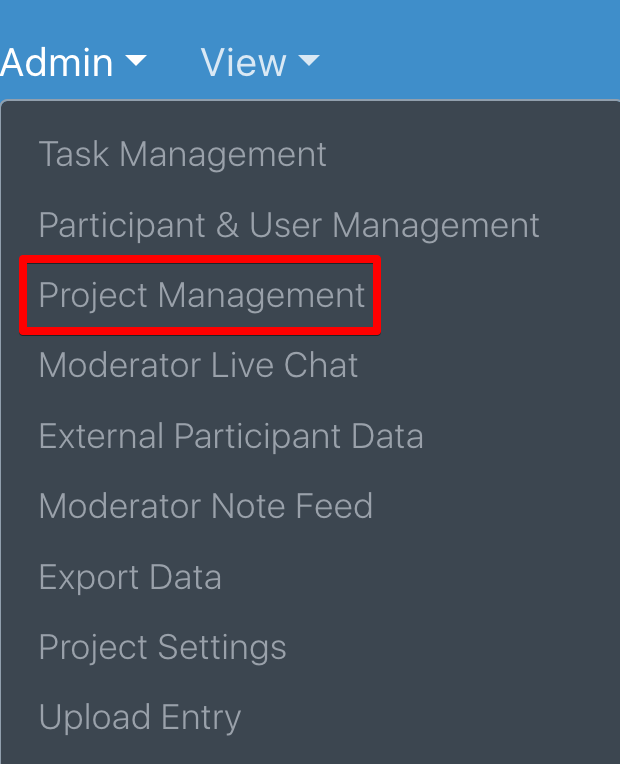
The project management page can be used to track participant progress and to communicate project-related needs. It can be accessed within the Admin drop down in the top navigation.
This page contains a full list of the participants invited to the project. To the right of each participant’s name is a series of columns that provide different pieces of information about the progress they have made so far in the study. You can scroll to the right to see additional columns.

Participant Start Date: This is an optional field. If left blank during manual participant uploads or bulk imports, it will default to the current date for each participant. You can also click the date on the Participant & User Management page to update it. This field helps track when participants started your project. Recruiters often bring in participants on different days, so it’s useful to see when they were uploaded to determine if they have begun their tasks.
The Web Login column is the best way to know if a person has logged into your project. If you see a date in this column, that means the person has logged in. If you do not see a date, that person has never logged in. Each time a person logs in, this date will update.
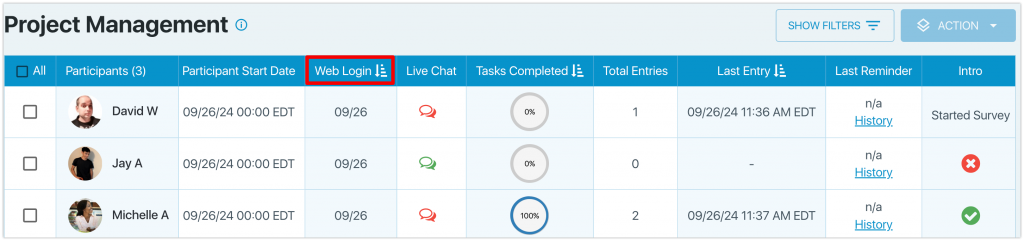
Live Chat: This column lets you know if the participant is available to chat. A green chat bubble indicates they are online, while a red chat bubble indicates they are not. If you click on the chat bubble (regardless of whether they are online or not), you will be brought to the Moderator Live Chat page, where you can chat with the participant or leave a message for them to view later. If the participant isn’t available when you send them a live chat message, they’ll receive a web notification that they can see when they log back in, and they will also receive an email with this message.
Tasks Completed: When a participant fully completes the survey, their progress will reflect as 100% complete. Should a participant partially complete the survey—say, answering only two questions—their progress will remain at 0%. Nonetheless, the responses to the questions they did answer will be accessible in the dashboard. For example, in the provided screenshot, although Dave W. has responded to 1 out of the 2 survey questions, his completion rate is still displayed as 0% because we recognize a survey as complete only when all questions have been answered.

Total Entries: This column shows you how many questions of your survey the person took.
Last Entry: This column displays the date and time (in the participant’s time zone) of their last entry upload. It’s a great way to quickly monitor who might be falling behind!

Last Reminder: This column serves as a comprehensive log of all reminders dispatched to a participant. It displays the date and time of the most recent reminder sent. For a detailed view of all sent reminders, simply select the ‘History’ option.

Individual Task Progress: As you move rightward through the interface, you’ll see indicators showing each participant’s task submission status. A green check mark indicates the survey has been successfully completed, while a red ‘X’ means no questions have been answered. If you see “Started Survey,” it means at least one question has been completed. For example, in the illustration below, David W. has a “Started Survey” status because he has begun but not finished the survey, Jay has a red ‘X’ because he hasn’t started, and Michelle has a green check mark indicating she has completed the survey.

Action: If you click the check box to the left of a participant’s name, you can complete several tasks by clicking the ‘Action’ drop down in the top right. You can select a single participant, multiple, or all participants.
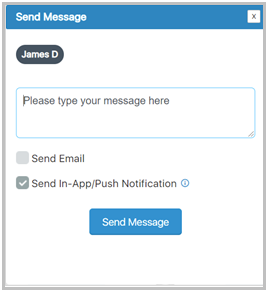
Through the action drop down, you can send a message, add the participant to a new task, or export their data.

Send Message: You have two messaging options.
1. Emailing is the preferred communication method for reaching out to participants within a video survey project. It’s the standard choice and has the highest likelihood of being noticed by the recipients.
2. In-app/web messaging is available for seamless communication. Messages can be conveniently accessed on the Moderator Live Chat Page, and participants will receive notifications through the back-end bell alert when they sign in on any device to complete the survey.
Add Task: You can use this action to create a new survey for participants to complete. You will be redirected to the new task page, where the participants selected will already be individually assigned to the task at the bottom of this page.
Export: When you click the export option within the Action drop down, you will download the selected participant’s data in a CSV file.
SHOW FILTERS: Utilize the ‘Show Filters’ button located at the upper-right corner of the page to seamlessly tailor your project view. You can refine the display based on certain participants or incorporate specific external participant data previously uploaded. As demonstrated in the following screenshot, I will apply a filter to display only Male participants.
