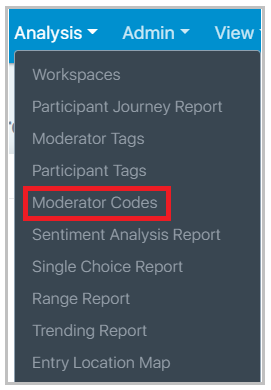
The Moderator Codes page can be accessed through the Analysis dropdown within the top navigation.
As entries are submitted, you will begin to code them. As more entries come in, you may want to change your existing codes. However, instead of changing your codes, you can simply create a new layer and add your updated codes to it. Over time, you may end up with many layers, each populated with new variations of older codes/layers. This will give you an audit trail of how your thinking evolved as the project progressed. This is a great feature for constructing meanings, insight, and implications.
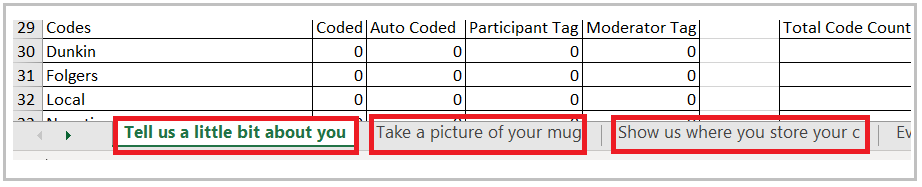
Filtering: Under the page name are the filtering options. You can only view one participant and one task at a time. The coded filter allows you only to view entries that have already been coded or that have not been coded yet.

You can use the arrows on either side of the participant’s name at the top of the page to scroll between participants. This allows you to code the same task across all participants easily.

The top left of the entry will display the media or content submitted by the participant. Below this, you will see the task type and the date and time the entry was submitted. To the right of the task type is the expand entry icon, which allows you to see all of the entry’s underlying details. Below the date and time, you’ll find the task title along with the entry description left by the participant.
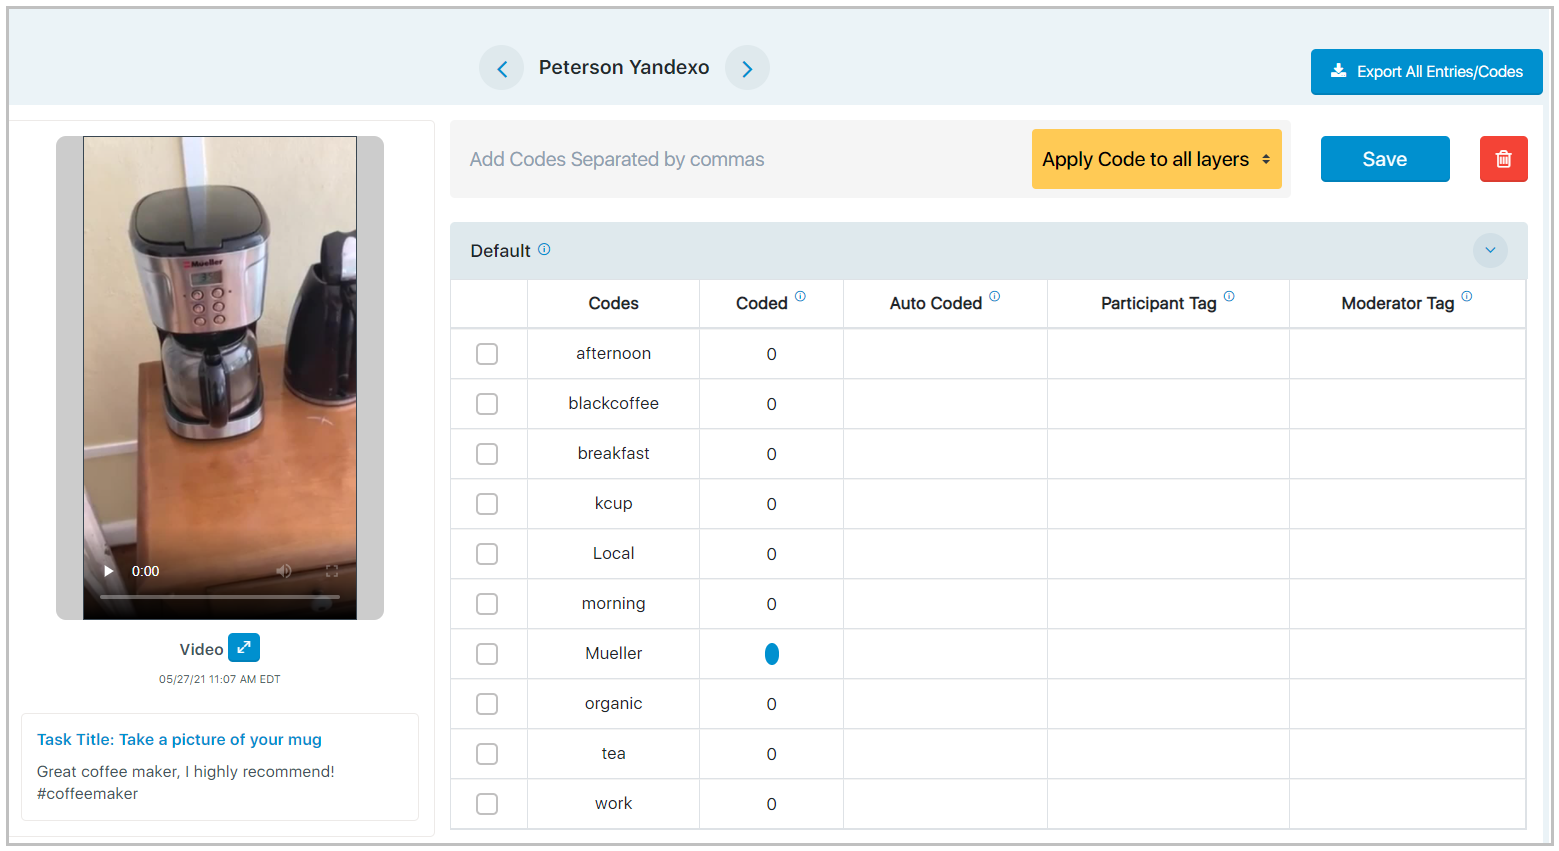
Adding a code: You can type the code options you want in the text field separated by commas. Then, decide if you want to add the codes to a single layer or all layers by clicking the dropdown in the yellow box. Once the codes and layer are selected, click Save to add the codes.

Coding an entry: You can code or uncode an item by clicking the 0. When the 0 is blue, it means it’s coded. When it’s not blue, it doesn’t have that code. You do not need to click save for coding changes to go into effect, you just need to click or unclick the 0.

Adding a layer: A layer is a group of codes. You can create a new layer by typing the layer name you want into the text field. Then click the dropdown in the yellow box and select ‘create new layer’. You can then click save to create the new layer.
Codes: This is the list of Codes available within a layer.
Coded: This column lets you know if an item is coded or not. You can code or uncode an item by clicking the 0. When the 0 is blue, it means it’s coded; when it’s not blue, it doesn’t have that code. You do not need to click save for coding changes to go into effect.
Auto Coded: Auto Codes are a suggestion to the researcher that you may want to code an entry a certain way. If a participant mentions a moderate code you’ve added on this page to an entry description, tag, video/audio transcription, or open-ended task it will get marked Auto Coded. Auto coding can be turned on through the project settings page within the admin dropdown.

Participant Tag: If the code also matches a participant tag, then there will be a check mark within this column. This is to help you decide if the entry should be coded a certain way.
Moderator Tag: If the code also matches a moderator tag, then there will be a check mark within this column. This is to help you decide if the entry should be coded a certain way.
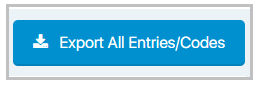
Export All Entries/Codes: Clicking on this button will export all the data related to moderator codes for all the participants who participated in the tasks assigned to them in the project.
The downloaded data will be in the form of an Excel report.
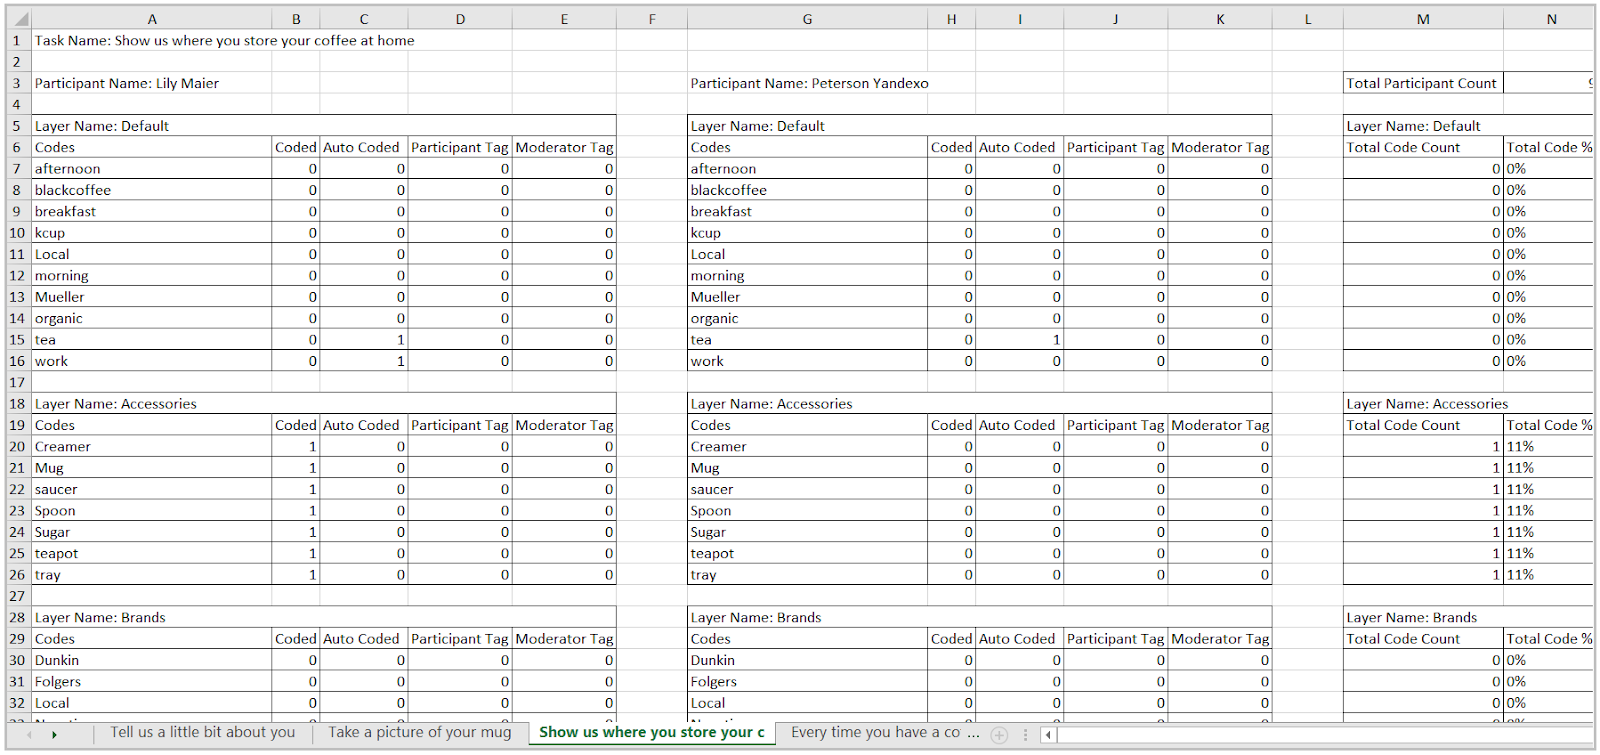
All the tasks will come on different sheets.
The participants’ data will come side by side. If any participant was not a part of the task, that participant will be eliminated from that task’s data. The coded data will be marked ‘1’ and uncoded will be marked ‘0’

On the extreme right of the report, we have ‘Total Participant Count’. It is the total number of participants that were assigned a particular task. ‘Total Code Count’ is an addition of all the codes under ‘coded column’, and the ‘Total Code %’ gives the percentage based on the ‘Total Participant Count’. This provides us with good insight into how many times a particular code was coded by the moderator.
