To set up a new project on EthOS, select the “New Project” option upon signing in.
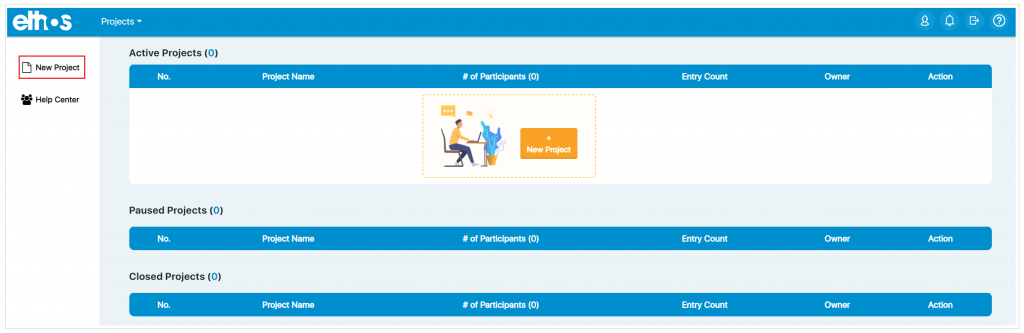
Once you click “New Project,” you will be taken to the below page to fill in your project details.
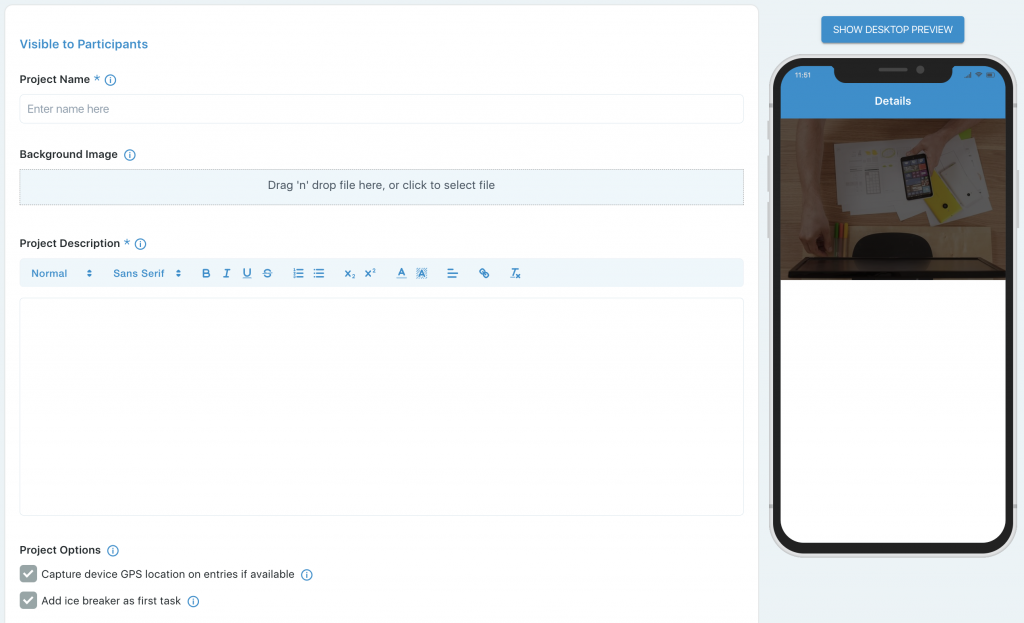
On this page and other pages of the EthOS platform, you will see tooltip icons that you can hover over that will provide you with additional information.
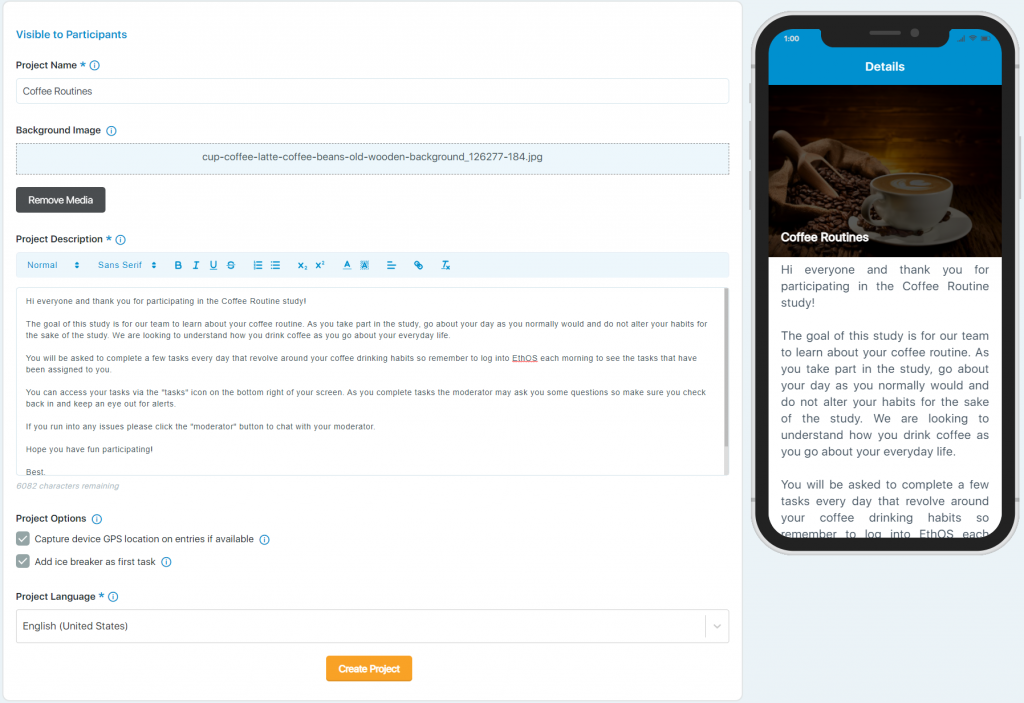
Project Name: This is the title of your project and will be displayed in the apps.
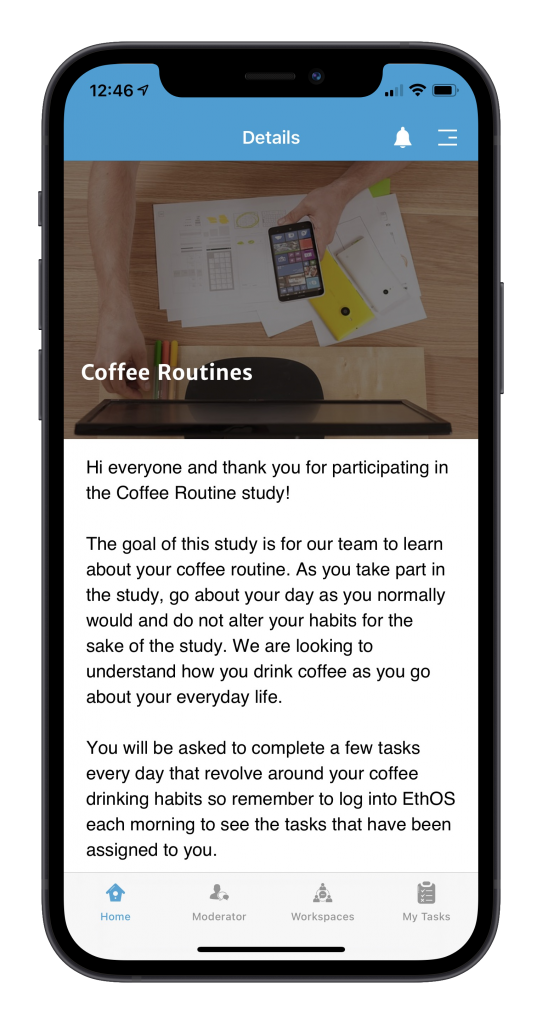
Background Image: This is an image you can put on for the background of your project and is shown in the apps. The ideal image size is 1280 x 854 (width x height) and should be a jpg or png file. If you do not add a background image, the one shown in the simulator will be displayed by default.
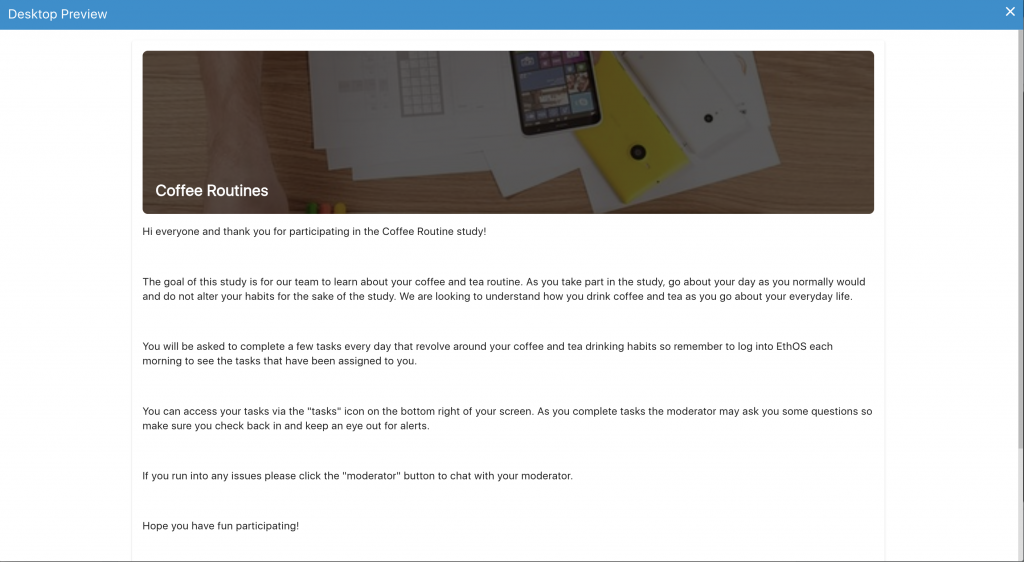
Project Description: This is where you enter a description of the project so the participants know what is expected of them to complete the project successfully. It may contain information such as the goal of the project, how many tasks will be assigned to the participant, the reward, or other important information that you want to share with your participants.
Project Options:
Capture device GPS location on entries if available: If checked, each time a person uploads an entry into EthOS, we will record the location on a map and have it available for you in the dashboard and via the Entry Location Map report. For this feature to work, participants must agree to share this information when they sign into the EthOS app for the first time, and for desktop screen recordings, they will also have to agree. You can turn this on/off via the Admin > Project Settings area anytime.
Add ice breaker as first task: The ice breaker task helps warm participants and familiarize them with the app. It asks participants to talk briefly about themselves while taking a selfie video. The icebreaker can be deleted or edited/changed after you create the project within the Task Management area.
Project Language: For App + Desktop/Laptop projects, the only available language is English.
The language will be utilized to transcribe Audio and Video files submitted by participants. The project within the apps will also be in the selected project language. The transcriptions are then used for both Sentiment and Tone analyses (if available in your project language).
As you fill in the information, you can see a preview on the right of how it will look to the app participants. You can also click Show Desktop Preview on the top right to preview it as a desktop participant. Here is a project ready for you to click “Create Project”.
Here is the default background image if you do not put your own on:
Here is a Desktop Preview: