To schedule and participate in a video call, you must use Google Chrome (recommended) or Safari on a desktop or laptop computer. Smartphones and tablets (including iPads) are not compatible.
Please note that sessions are typically recorded by the moderator, and participants are expected to remain on camera during the video call unless instructed otherwise.
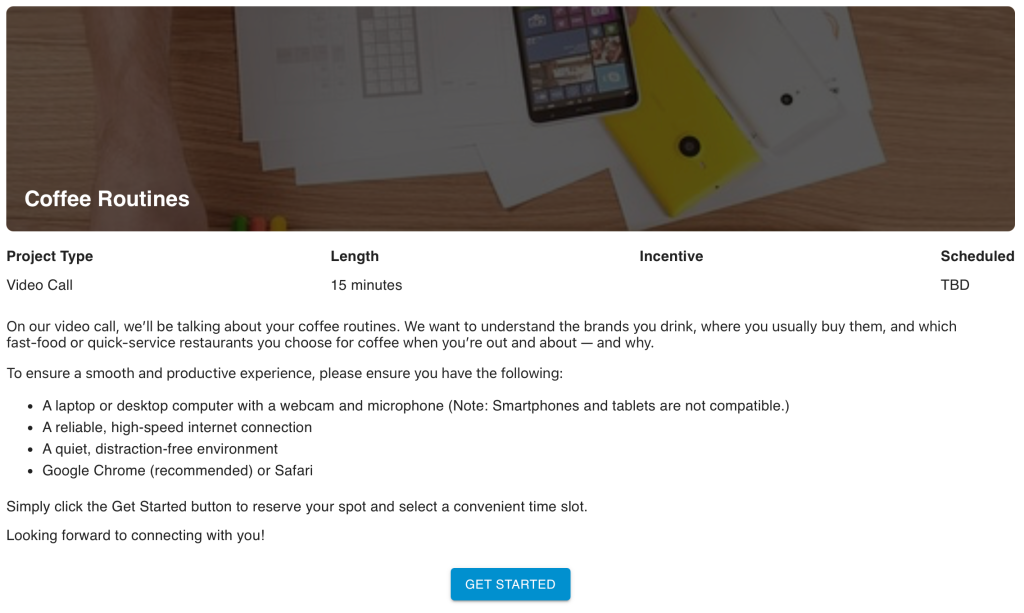
On the front page, you will see a set of instructions (as shown below). Please review them carefully, then click the GET STARTED button.
Selecting A Session Time
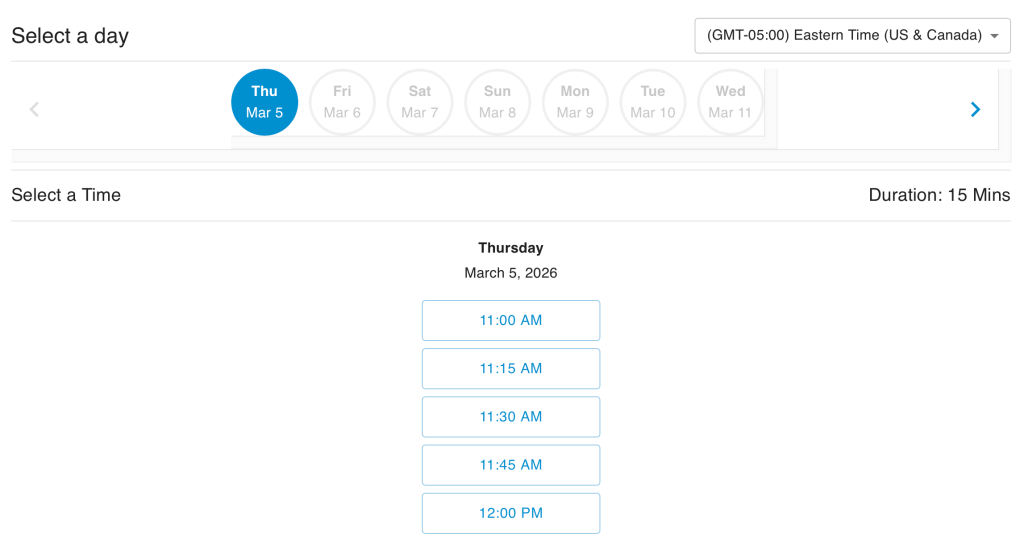
On the next page, you will see a calendar at the top and a time zone selector on the right. Before selecting a session, confirm that the correct time zone is selected in the dropdown menu.
Click the date you would like to schedule. Depending on the project, multiple dates and times may be available, or there may be limited options. The selected date will appear highlighted in a blue filled circle.
In the example below, available time slots for Thursday, March 5 are displayed. Select the time that works best for you.
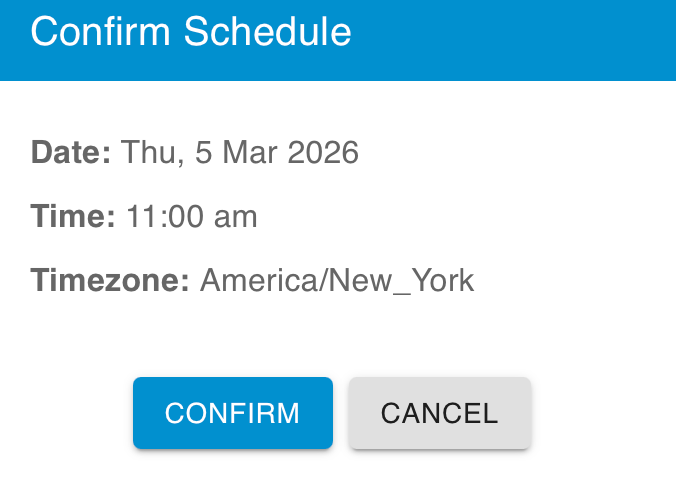
After selecting a time, a confirmation window will appear (as shown below). If the date, time, and time zone are correct, click CONFIRM.
Rescheduling or Cancelling Sessions
You will then be taken to a confirmation screen. In the top-right corner, you will see your scheduled session details. At the bottom of the page, you will see two options:
Reschedule
Click Reschedule to return to the calendar. If alternative time slots are still available, you may select a new session time.
Cancel
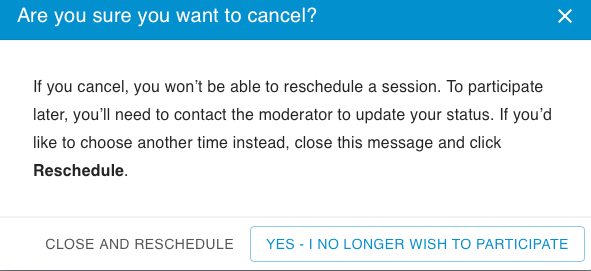
If you are unable to attend any available session times, click Cancel. A confirmation pop-up will appear (as shown below).
The pop-up provides two options:
- Click Close and Reschedule if you would like to select a different time.
- Click Yes – I no longer wish to participate if you no longer plan to take part in the project.
If you choose the option indicating you no longer wish to participate, you will not be able to schedule another session unless a moderator re-enables access for you.
How To Join A Session
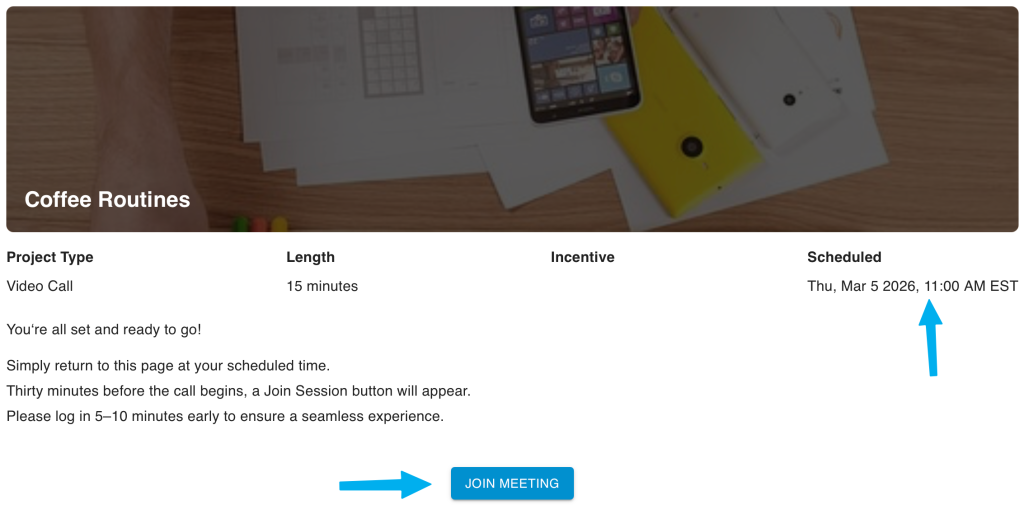
As the session start time approaches, a JOIN MEETING button will appear on this page (as shown below). If you are already on the page, you will need to refresh your browser for the button to display.
We recommend joining the session five minutes early. For example, if your session is scheduled for 11:00 AM, please join at 10:55 AM to test your microphone and prepare for the discussion.
The Join Now Button is Not Working?
Pop Up Blockers
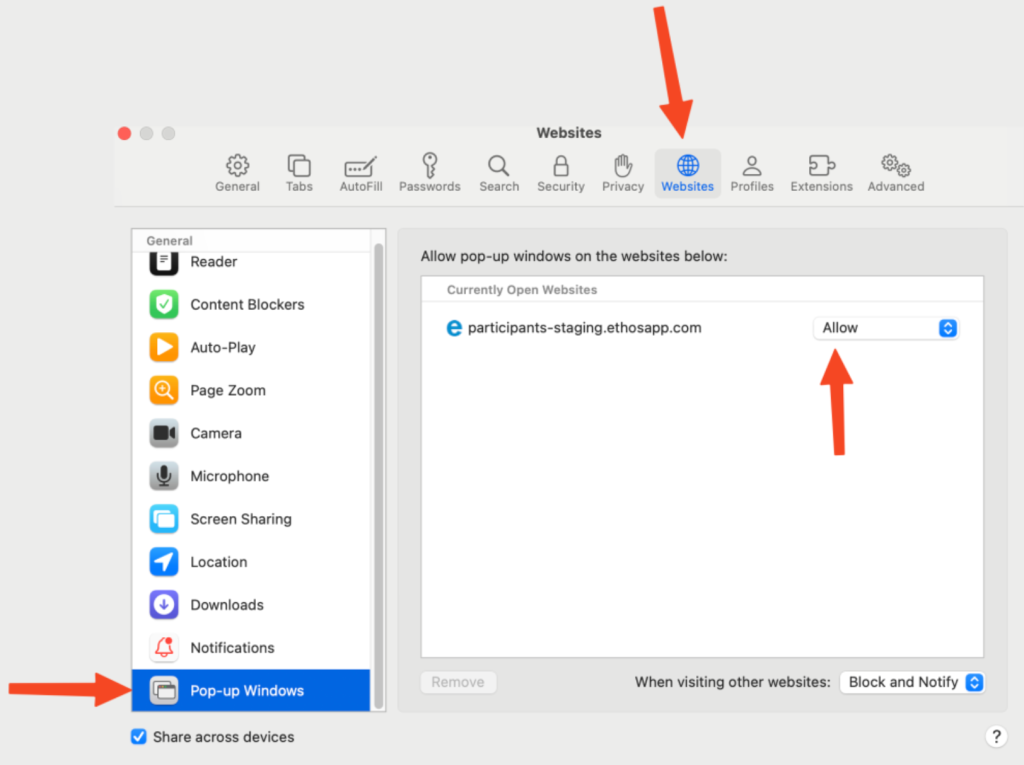
If you’re using Safari to join a video call, or if you have a popup blocker enabled in your browser, you may need to disable it to join the call. For Safari, follow these steps to turn off the built‑in popup blocker (your menu options may vary slightly depending on your version of Safari).
1. Click Safari at top

2. Click Settings.
3. Select Websites, then scroll down to Pop‑up Windows.
4. Change Block and Notify to Allow, as shown in the screenshot below. Steps 3 and 4 are highlighted in the screenshot.
Setting Up Microphone & Camera
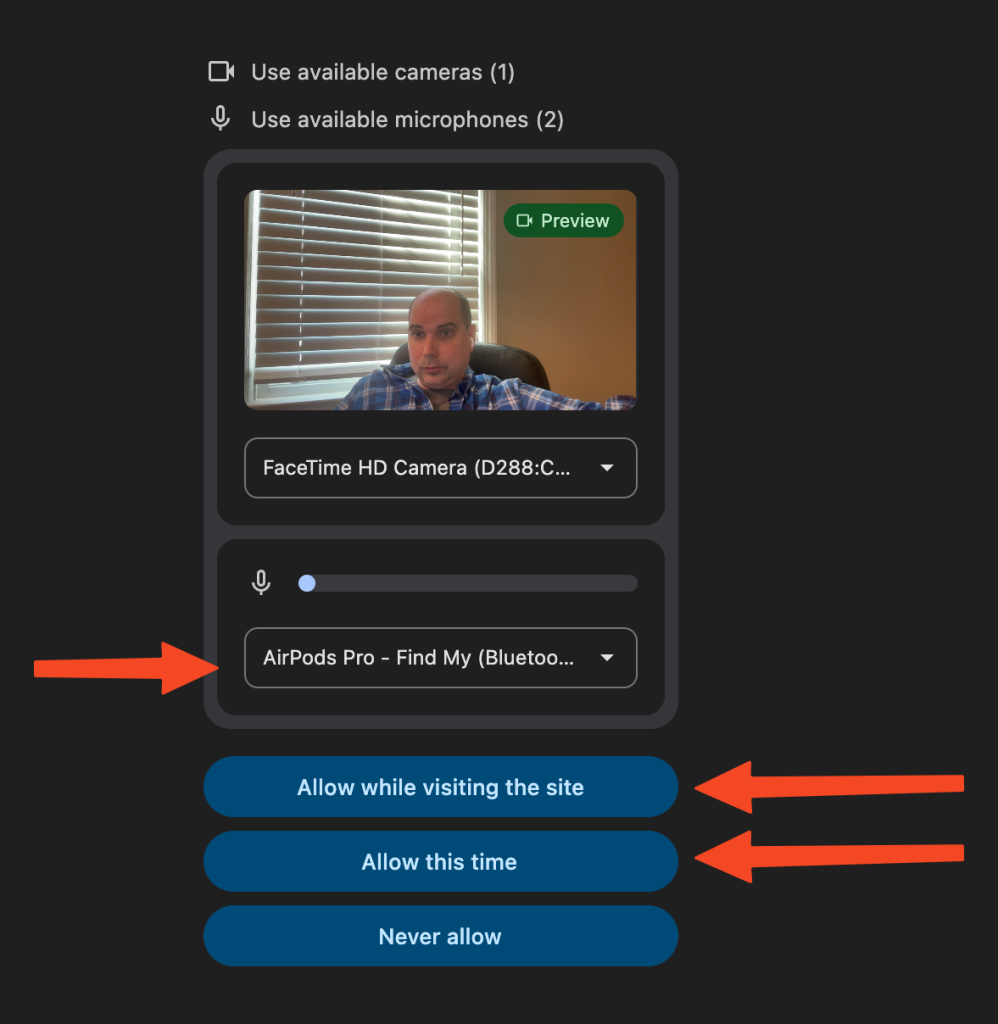
Once you join a video call you will see a window like below, which is a preview of you and the settings. In the screenshot below you will see the user has his camera on, and is using Airpods for the call. If the device is correct do some talking and the microphone area should move, indicating your microphone is working correctly. You can click where it says Airpods in this shot to change your device. Make sure at the bottom you select one of the two choices and do not click Never allow.
Once you click one of those options you will be taken to the below page
Adding a Background
On the right-hand side, you will see the icon shown below. This allows you to enable a virtual background if you choose to use one during the session.

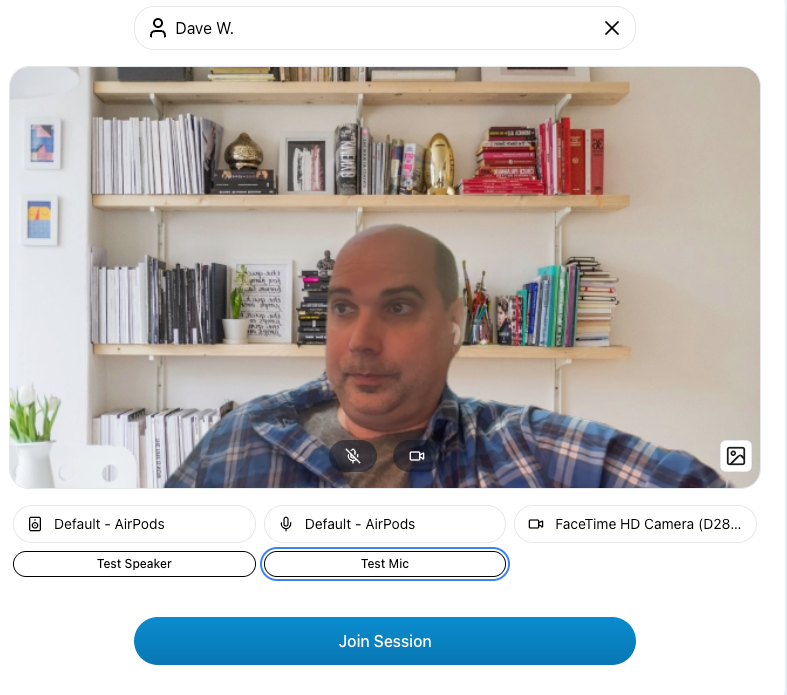
Test Speaker
The Test Speaker option plays a sound so you can confirm that your speakers or headphones (such as Apple AirPods) are working properly. To run the test, click Test Speaker. When finished, click it again to Stop the test.
Test Microphone
To test your microphone, click the Test Mic button. The button will change to Recording, allowing you to speak for a few seconds. When finished, click the button again. It will switch to Playing, and if your microphone is working correctly, you will hear the audio you recorded.
Once you are ready, click Join Session to enter the video call.
Overview of What You’ll See After Joining the Video Call
Once you join a session you will see the below icons at the bottom of your screen. Here is what each do.
